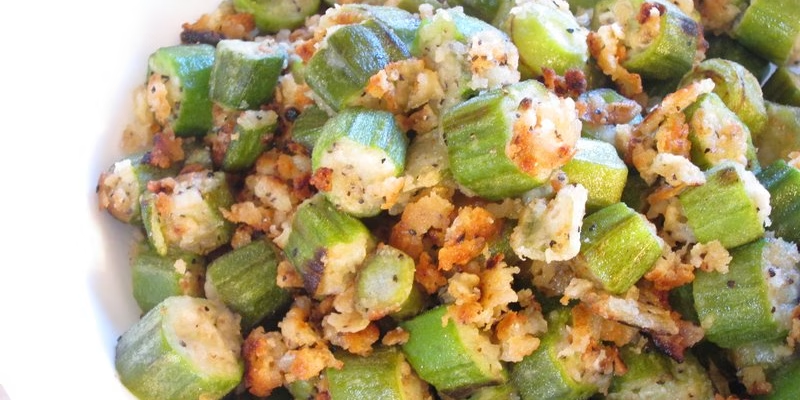
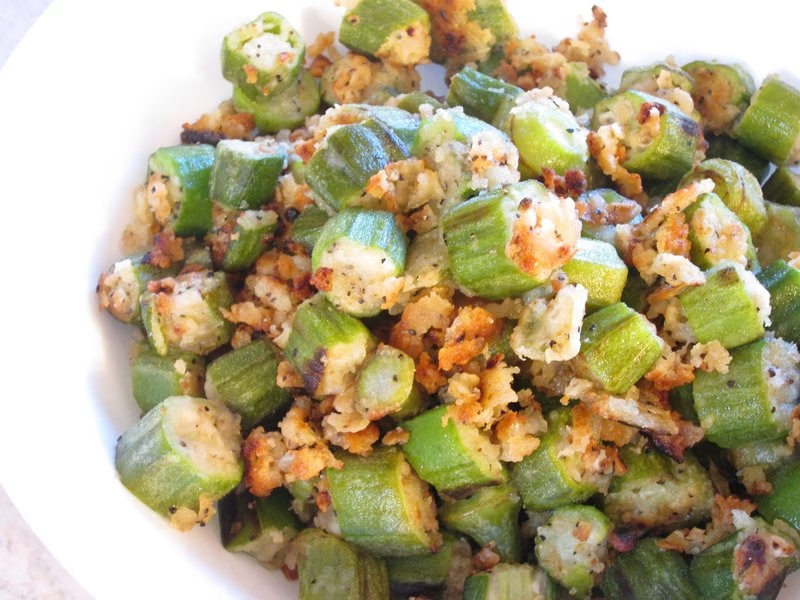
Fried okra is more than just a side dish; it’s a Southern staple that brings a delightful crunch and earthy flavor to the table. Originating from Africa and widely embraced in Southern cuisine, fried okra has become a beloved favorite for many. Its unique gummy texture when cooked contrasts wonderfully with the crispy batter of fried goodness. In this article, we’ll explore how to make fried okra at home, including essential ingredients, popular variations, and tips to achieve that perfect crunchy coating. You’ll also learn how to serve it, the nutritional benefits, and answers to common questions about this delightful dish!
Ingredients
| Ingredient | Measurement | Description |
|---|---|---|
| Fresh Okra | 1 pound | Fresh okra offers a tender yet crunchy texture that is the star of this fried dish. |
| Cornmeal | 1 cup | Cornmeal adds the essential crispiness and contributes to the classic Southern flavor. |
| All-Purpose Flour | 1/2 cup | Using flour helps create a fluffier batter and enhances the fried okra’s texture. |
| Salt | 1 teaspoon | Salt brings out the natural flavors of the okra and is essential for seasoning. |
| Black Pepper | 1/2 teaspoon | A hint of pepper adds a touch of spice, balancing the overall flavor profile. |
| Cayenne Pepper (optional) | 1/4 teaspoon | This adds an extra kick for those who enjoy a bit of heat in their fried okra. |
| Egg | 1, beaten | A beaten egg helps the coating stick better to the okra while frying. |
| Vegetable Oil | for frying | Use a neutral oil with a high smoke point for frying, like canola or peanut oil. |
Step-by-Step Instructions
- Step 1: Prepare the Okra – Rinse the fresh okra under cool water and pat it dry. Slice each okra pod into 1/2-inch pieces. This will ensure even cooking and that perfect texture in your fried okra.
- Step 2: Make the Coating – In a large bowl, combine the cornmeal, all-purpose flour, salt, black pepper, and cayenne pepper. Mix well. In another bowl, beat the egg and set aside. The combination of cornmeal and flour will create a light yet crispy coating for the fried okra.
- Step 3: Coat the Okra – Dip the sliced okra into the beaten egg, ensuring each piece is well-coated. Then, transfer the okra to the bowl with the flour mixture, tossing until all pieces are evenly coated. This step is crucial for achieving that crispy fried okra we all love.
- Step 4: Heat the Oil – In a large skillet or deep fryer, pour enough vegetable oil to submerge the okra pieces or use about 1/2 inch of oil for frying. Heat the oil over medium-high heat until it reaches approximately 350°F (175°C). You can test if it’s hot enough by dropping a small amount of batter into the oil; if it bubbles and rises to the surface, you’re ready to fry!
- Step 5: Fry the Okra – Carefully add the coated okra in batches, being careful not to overcrowd the skillet. Fry for about 3-4 minutes or until golden brown and crispy. Flip them occasionally to ensure even cooking. Once done, use a slotted spoon to remove the fried okra and place it on a paper towel-lined plate to absorb excess oil.
- Step 6: Serve and Enjoy! – Once drained, serve your fried okra hot. It pairs wonderfully with your favorite fried okra sauce, such as ranch dressing or remoulade. Enjoy it solo, or as a side dish with your meal!
Pro Tips
- Tip 1: For even crispier okra, chill the coated okra in the refrigerator for about 30 minutes before frying. This helps the coating adhere better.
- Tip 2: Use fresh okra as much as possible. Frozen okra can work in a pinch but may result in a soggier texture when fried.
- Tip 3: Keep an eye on the oil temperature to prevent the okra from absorbing too much oil during frying. Use a thermometer for best results.
- Tip 4: Experiment with spices! Adding garlic powder or smoked paprika can enhance the flavor of your fried okra.
- Tip 5: If you want a vegan option, replace the egg with a mixture of 1 tablespoon of ground flaxseed and 2.5 tablespoons of water, let it sit to thicken before coating!
Nutritional Information
| Nutrient | Per Serving (1 cup) |
|---|---|
| Calories | 160 |
| Protein | 4g |
| Carbohydrates | 29g |
| Saturated Fats | 1g |
| Fiber | 3g |
| Cholesterol | 25mg |
| Sugars | 1g |
| Total Fat | 7g |
FAQs
What is the best way to store Fried Okra?
Store leftover fried okra in an airtight container in the refrigerator for up to 3 days. To reheat, bake in the oven to restore some of the crispiness.
Can Fried Okra be made vegan or gluten-free?
Yes! To make vegan fried okra, substitute the egg with a flaxseed mixture. For gluten-free, use gluten-free flour and cornmeal.
What are the best side dishes to serve with Fried Okra?
Fried okra pairs well with southern dishes like collard greens, cornbread, and fried chicken. It’s also great alongside dips like ranch or hot sauce.
How long does it take to prepare Fried Okra?
The total time from preparation to cooking should be about 30-40 minutes, depending on your chopping skills and frying method.
Can I freeze Fried Okra for later?
Yes! To freeze, first, let the fried okra cool completely. Then, place it in a single layer on a baking sheet to freeze, and once frozen, transfer to an airtight container for up to 2 months.
What if I don’t have cornmeal? Can I use something else?
If you don’t have cornmeal, you can substitute it with more all-purpose flour or panko breadcrumbs for a different but still delicious texture.
Can I bake Fried Okra instead of frying it?
Yes! Toss the coated okra with a little oil and bake at 425°F until crispy, about 15-20 minutes, flipping halfway through.
What are some Fried Okra variations?
Popular variations include adding cheese for a cheesy version, or spices like cajun seasoning for a spicy kick. You can also try different batters like beer batter for a unique twist!
Now that you have the complete guide on making crispy, delicious fried okra, it’s time to get cooking! The crunchy snack is not just tasty; it’s a versatile dish that can complement various meals. Try it out, and don’t forget to share your experience in the comments below. Did you add your spice twist, or enjoy it with your favorite sauce? We’re excited to hear from you!