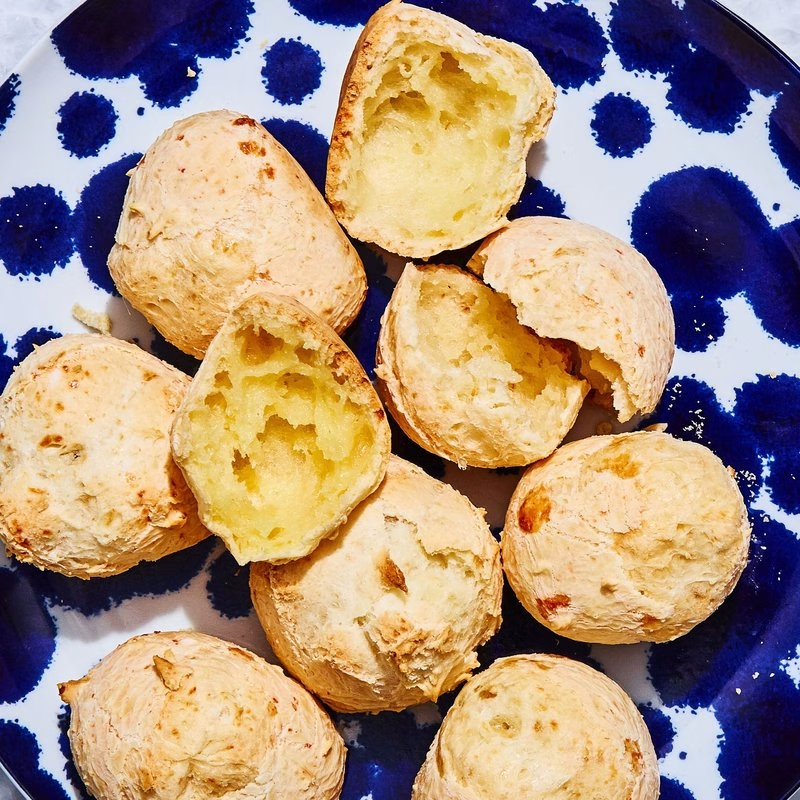
Ah, Pão De Queijo (Cheese Bread)! This delicious Brazilian snack has stolen hearts and tastebuds around the world. With its crispy exterior and fluffy, cheesy interior, it’s no wonder people rave about it. Originating from the state of Minas Gerais, this gluten-free treat is made primarily from tapioca flour, which gives it a unique chewy texture that’s simply irresistible. The crumbled cheese mixed into the dough creates a savory flavor that can brighten any gathering or simply satisfy a late-night snack craving.
In this article, you’ll discover how to *make Pão De Queijo (Cheese Bread) at home*, the key Pão De Queijo (Cheese Bread) ingredients, and some fun variations to try. Plus, we will dive into nutritional facts and answer common questions. Let’s get cheesy!
Ingredients
| Ingredient | Measurement | Description |
|---|---|---|
| Tapioca flour | 2 cups | Tapioca flour is the star here, yielding that signature chewy texture in your Pão De Queijo (Cheese Bread). |
| Milk | 1 cup | Milk adds richness. You can use whole, skim, or even a dairy alternative—whatever floats your boat! |
| Oil | 1/3 cup | Oil is crucial for a soft texture, ensuring your cheese bread doesn’t end up dry. |
| Eggs | 2 large | Eggs bind everything together, creating a delightful dough that rises beautifully. |
| Cheese (e.g., Parmesan or Minas cheese) | 1 cup, grated | Cheese is what makes this bread special. More cheese means more flavor! |
| Salt | 1 teaspoon | Salt enhances flavors—don’t skimp on this one! |
Step-by-Step Instructions
- Step 1: Preheat Your Oven – Set it to 375°F (190°C). A hot oven is key for that perfect golden-brown crust.
- Step 2: Heat Ingredients – In a pot, combine milk, oil, and salt. Bring it to a gentle boil over medium heat. This step helps blend the flavors beautifully.
- Step 3: Combine Flour – Once your milk mixture boils, remove it from heat and stir in the tapioca flour. Mix until a sticky dough forms. Let it cool for about 10 minutes—patience is key!
- Step 4: Add Eggs – After the mixture cools, incorporate the eggs one at a time, mixing well after each addition. This will give your Pão De Queijo (Cheese Bread) that soft and fluffy texture.
- Step 5: Cheese, Please! – Fold in the grated cheese. The more cheese, the better! Now you have a beautiful dough that’s ready to shape.
- Step 6: Shape the Dough – Using your hands or a spoon, form small balls (about the size of a golf ball) and place them on a greased baking sheet. Make sure to leave enough space between them, as they will puff up!
- Step 7: Bake – Slide your baking sheet into the oven and bake for 15-20 minutes, or until they’re puffed and golden. Keep an eye on them—they can go from perfect to overdone in a flash.
- Step 8: Serve Warm – Once out of the oven, let them cool for a few minutes. Enjoy your delicious Pão De Queijo (Cheese Bread) warm, ideally paired with a dipping sauce!
Pro Tips
- Experiment with Cheese! – While Parmesan is traditional, try using cheddar, mozzarella, or even blue cheese for a twist.
- Make Ahead – You can freeze the shaped dough balls and bake them straight from the freezer. Just add a few extra minutes to the cooking time.
- Cheesy Filling – For an extra touch, consider stuffing the dough with a small cube of cheese before baking.
- Adjust Texture – For a crispier exterior, bake them longer until golden brown. If you prefer a softer roll, take them out a bit earlier.
Nutritional Information
| Nutrient | Per Serving |
|---|---|
| Calories | 120 |
| Protein | 3g |
| Carbohydrates | 15g |
| Saturated Fats | 2g |
| Fiber | 0g |
| Cholesterol | 20mg |
| Sugars | 0g |
| Total Fat | 5g |
FAQs
What is the best way to store Pão De Queijo (Cheese Bread)?
Store them in an airtight container at room temperature. They taste best the day of, but you can keep them for up to three days.
Can Pão De Queijo (Cheese Bread) be made vegan or gluten-free?
Yes! You can substitute the eggs with flaxseeds or applesauce and use vegan cheeses. The tapioca flour is naturally gluten-free.
What are the best side dishes to serve with Pão De Queijo (Cheese Bread)?
They pair perfectly with a simple salad, or for something heartier, you can serve them with black beans and rice!
How long does it take to prepare Pão De Queijo (Cheese Bread)?
From start to finish, including prep and baking, you’re looking at about 45 minutes.
Can I freeze Pão De Queijo (Cheese Bread) for later?
Absolutely! Freeze the uncooked balls on a parchment-lined tray, then transfer them to a freezer bag. Bake them when you’re ready.
Can I use other types of flour instead of tapioca flour?
Tapioca flour is essential for the right texture in Pão De Queijo (Cheese Bread). Other flours won’t recreate that delightful chewiness.
Is Pão De Queijo (Cheese Bread) typically served as a snack or a side dish?
Both! It’s often enjoyed as a snack but can also accompany meals.
What is the history of Pão De Queijo (Cheese Bread)?
This beloved bread traces its roots back to the indigenous peoples of Brazil, evolving with the introduction of dairy farming in the Minas Gerais region.
Now that you’ve learned how to make authentic Pão De Queijo (Cheese Bread), it’s time to get baking! This delightful cheese bread is perfect for gatherings, snacks, or just when you want a taste of Brazil in your own kitchen. Don’t forget to share your experience with this homemade Pão De Queijo (Cheese Bread) in the comments below—your feedback makes it all worthwhile!