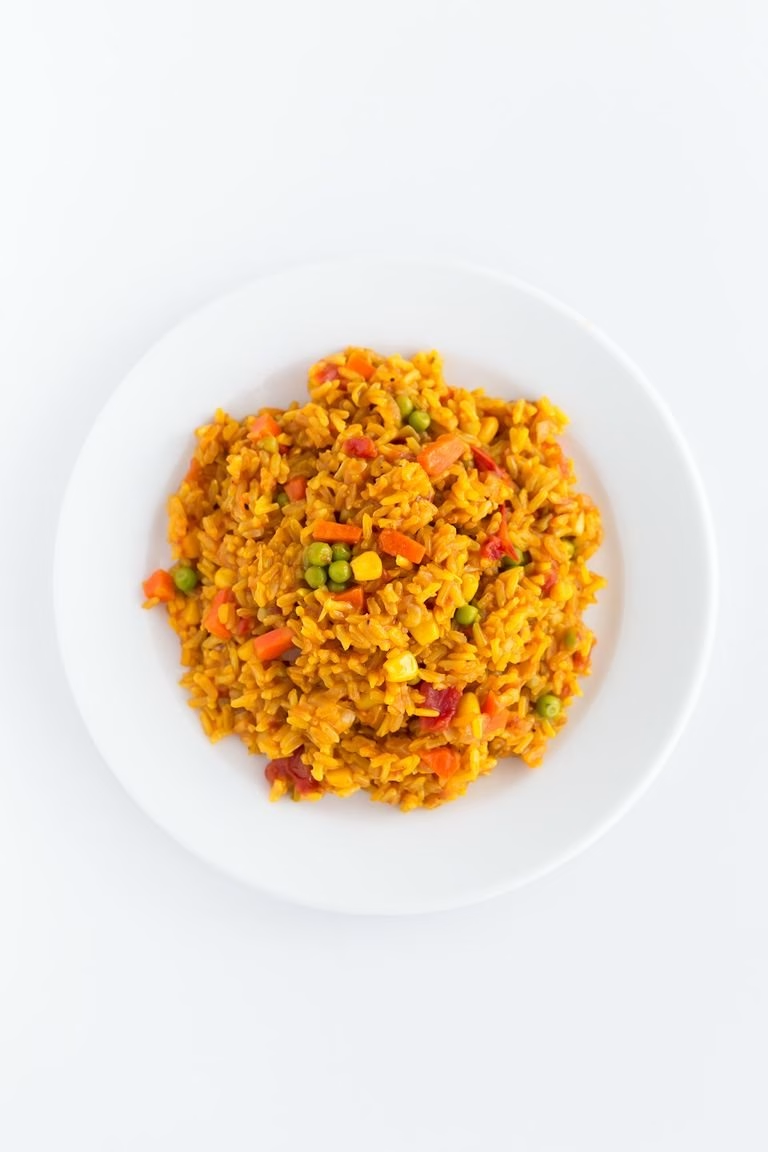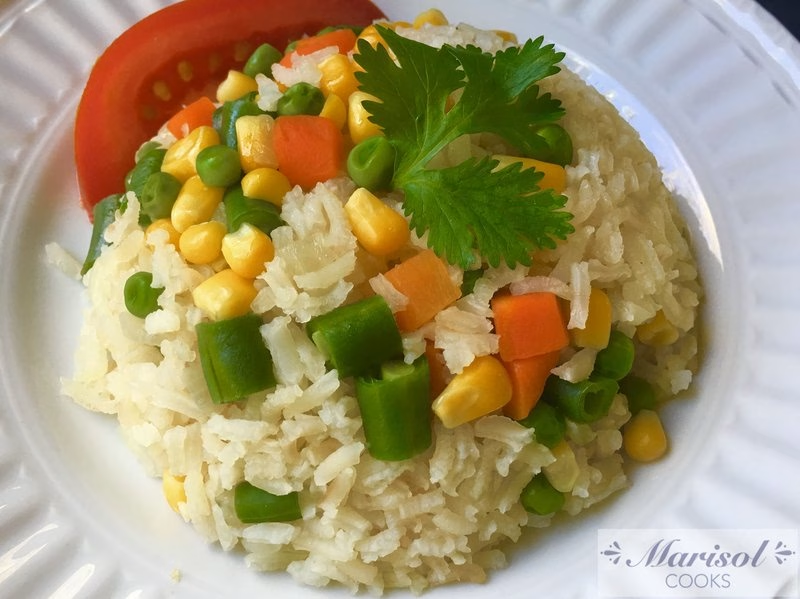
Have you ever craved a dish that’s both hearty and healthy? Meet Arroz A La Jardinera (Vegetable Rice)! This delightful dish bursts with vibrant colors and flavors, making it a staple in many Latin American homes. Its origin takes root in the rich culinary traditions of Peru, where it’s not just food but a representation of farm-fresh produce and family gatherings. This dish is often a centerpiece, combining the wholesome goodness of rice with a medley of colorful vegetables such as peas, carrots, and bell peppers.
In this article, you’ll discover how to prepare your very own Arroz A La Jardinera (Vegetable Rice) at home. We’ll walk through the ingredients you’ll need, step-by-step instructions to guide you through the cooking process, and even some nutritional insights. Plus, you’ll find tips and common questions answered about this fantastic dish. So, grab your apron, and let’s dive into the world of Arroz A La Jardinera (Vegetable Rice)!
Ingredients
| Ingredient | Description |
|---|---|
| 2 cups of rice | Long-grain rice works best for fluffy Arroz A La Jardinera (Vegetable Rice), absorbing flavors beautifully. |
| 1 onion (chopped) | Fresh onions add a savory aroma that enhances the overall taste of Arroz A La Jardinera (Vegetable Rice). |
| 2 cloves of garlic (minced) | Garlic provides depth and earthiness, making your Arroz A La Jardinera (Vegetable Rice) truly irresistible. |
| 1 carrot (diced) | Adding carrots brings a natural sweetness and vibrant color to your dish. |
| 1 bell pepper (chopped) | Choose any color you like! Bell peppers introduce a crunchy texture and a sweet punch. |
| 1 cup of peas | Frozen or fresh, peas add a pop of color and are packed with nutrients. |
| 4 cups of vegetable broth | This is essential for cooking the rice, enriching the flavors in your Arroz A La Jardinera (Vegetable Rice). |
| 2 tablespoons of olive oil | Olive oil not only helps with cooking but also adds a subtle richness to the dish. |
| Salt and pepper to taste | To enhance all the ingredients and balance the flavors in your homemade Arroz A La Jardinera (Vegetable Rice). |
Step-by-Step Instructions
- Prepare the Ingredients: Start by washing the rice under cold water to remove excess starch. Chop your vegetables finely, as this will help them cook evenly and blend perfectly into your Arroz A La Jardinera (Vegetable Rice).
- Sauté the Veggies: In a large pan, heat the olive oil over medium heat. Toss in the chopped onion and minced garlic, cooking until they’re golden brown—about 3-5 minutes. This creates a fragrant base for your Arroz A La Jardinera (Vegetable Rice).
- Add Vegetables: Next, introduce diced carrots and bell peppers into the mix. Stir-fry for another 5 minutes until soft. This step is crucial for developing the flavors that make this dish so special.
- Cook the Rice: Pour in the rinsed rice and sauté it for a couple of minutes to let it absorb the flavors. Then, add the vegetable broth, along with salt and pepper to taste. Bring everything to a boil; once boiling, reduce the heat to low, cover, and let it simmer for about 20 minutes.
- Final Touches: After 20 minutes, fluff the rice with a fork and mix in the peas gently. Cover and let it sit for another 5 minutes, allowing the peas to warm up without overcooking.
- Assemble & Serve: Serve your freshly prepared Arroz A La Jardinera (Vegetable Rice) hot, optionally garnished with fresh herbs if desired. This dish pairs wonderfully with a side of avocado or a refreshing salad.
Pro Tips
- Customizable Veggies: Feel free to swap out any veggies based on your preferences or what you have on hand. Zucchini or corn can be delightful additions!
- Adding Protein: For a heartier meal, consider adding cooked chicken or shrimp. Just toss them in during the last few minutes of cooking.
- Rice Choice: While long-grain rice is recommended, you can experiment with jasmine or basmati for added fragrance.
- Storage: Leftovers can be stored in an airtight container in the fridge for about 3-4 days, making this a great meal-prep option.
Nutritional Information
| Nutrient | Per Serving |
|---|---|
| Calories | 250 |
| Protein | 6g |
| Carbohydrates | 45g |
| Saturated Fats | 1g |
| Fiber | 3g |
| Cholesterol | 0mg |
| Sugars | 3g |
| Fat | 4g |
FAQs
What is the best way to store Arroz A La Jardinera (Vegetable Rice)?
Store your Arroz A La Jardinera (Vegetable Rice) in an airtight container in the fridge for up to 4 days.
Can Arroz A La Jardinera (Vegetable Rice) be made vegan or gluten-free?
Absolutely! Just ensure you use vegetable broth instead of chicken broth and avoid any added proteins like meat.
What are the best side dishes to serve with Arroz A La Jardinera (Vegetable Rice)?
A fresh salad, grilled vegetables, or even a side of fried eggs can be fantastic companions to your Arroz A La Jardinera (Vegetable Rice).
How long does it take to prepare Arroz A La Jardinera (Vegetable Rice)?
Preparation and cooking time typically take about 35-40 minutes.
Can I freeze Arroz A La Jardinera (Vegetable Rice) for later?
Yes, you can freeze your Arroz A La Jardinera (Vegetable Rice). Just make sure to let it cool completely before placing it in a freezer-safe container.
Can I add more spices to Arroz A La Jardinera (Vegetable Rice)?
Feel free to add spices like cumin, paprika, or even a pinch of saffron to elevate the flavor of your dish!
What variations of Arroz A La Jardinera (Vegetable Rice) can I try?
You can try adding different proteins, mix up the vegetables, or even incorporate beans for added texture and nutrition.
Is Arroz A La Jardinera (Vegetable Rice) a healthy option?
This dish is packed with vegetables and is low in saturated fat, making it a great healthy meal option!
In summary, Arroz A La Jardinera (Vegetable Rice) is not just a meal; it’s a celebration of flavors and colors! With its easy preparation and nutritious ingredients, it makes for an ideal weeknight dinner or a fantastic addition to family gatherings. Don’t hesitate to put your spin on this recipe—every addition you make will create a unique version of this beloved dish.
We encourage you to try making Arroz A La Jardinera (Vegetable Rice) at home! Don’t forget to share your experience or any adjustments you made in the comments. Happy cooking!


